..continued
October 3, 2013
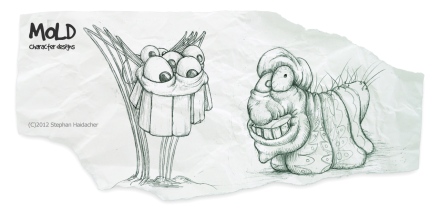
the story is very close to be completed (and I suspect it won’t leave this state until the very final months of production ;) , …. soooo) i’m back working on concept designs..
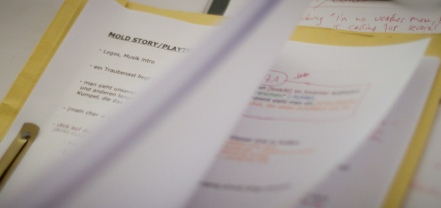
(the latest revision of the story/playthrough)
When i started to work on mold, I had to decide how to approach this pretty nonlinear endeavor. I did read some classic gamedesign documents like Grim Fandango, and some of the Larry(s)…. but clearly, computers must have evolved since the 90s, so maybe there was a more modern / better way to approach it, I naively thought.
—
—
So eventually i went with a vector schematic of the game… in the beginning it worked out great (except some tech probs ;) ), changes could be made with ease, and it was great to have an overview over the entire game…
but as complexity grew, it was getting harder and harder to play it through (mentally). Why? because when you work on a screen, u just see a tini-tiny portion of the schematic (you can’t read it without zooming way in), and printing it, would need tons of paper and a lot of space…

a bloated, useless schematic of the game
—
—
well, they are great, aren’t they? sure… but they can also be the last nail for your coffin, You can’t imagine how many little notes were written into my sketchbook and on dozens of loose papers, Mainly, because
in my case, eventually, I had a big bloated not-up-to-date digital schematic with most of the story, hundreds of papers and sketchbooks with all kind of changes, puzzle ideas, backstory elements, hell even “new” parts of the story. Unneccessary to say, this totally crippled the process… I arrived in “stucktown” so to speak.
–
—
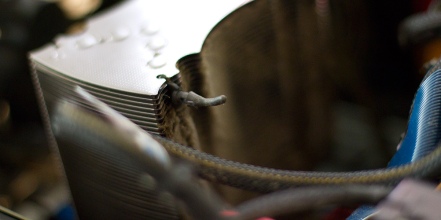
my workstations cpu-cooler, right before i had my cleaning frenzy
–
So eventually to overcome this state of unproductivity, Babette and I sat down, she took pen and paper, and we talked the story completely through (with the goal to continue even if something is not right or still unfinished). It took around 4 hours to work it through, still with a lot of stuff which was kinda “meehhh, maybe ok at most”, but now I knew where to start.
Since then, I searched and collected everything useable from old sketchbooks and papers, and revised the story several times (especially during vacation). Just to give you an idea: the first draft had 8 pages, the most recent one has 23.. so the oldschool approach is definitely the way to go in my opinion.
Game Pitches has an interesting collection of game design documents, in case you are into this kind of stuff ;)
—
—
I can’t speak about those numerous tools written to organize/plan explicitly adventure games, but working on a story is hard enough itself, the last thing someone needs is to struggle with buggy tools or technology… so don’t hesitate to give paper a try ;)
If you are totally stuck I would recommend:
—
so in my humble and home-educated opinion: a printed step by step story plus a reduced schematic (something like this) is the way to go.
that’s all folks! ;)
—

how lame is that? ;) to quote a movie character who quoted the wife of Archimedes of Syracuse? well you tell me ;) , but this wisdom is worth to be re-quoted anytime.
which brings me to my main point…. I took a break and went to a nice vacation in Croatia (and I loved every day of it ;) ) Being cut off TV and Internet, meant more photography, more walks, more “beach time” and way more discussions about the story…

so additionally to a great relaxing time, we locked down almost the entire story (just a few minor here and theres, but the overall thing is done).
so the next step is to create a list of all sets/items and characters…. then calculate it again and hope I don’t have to cut a lot :)

Hi guys!
This is one thing I have to share right away, in case you missed it (like I unfortunately did, until recently). PennyArcadeTV releases a weekly 5min cartoon show called “Extra Credits” covering all aspects of game design, theory, well almost all aspects of how a game changes/fit into our society.
Truly Amazing Stuff! I’ve blazed through 6 seasons in a few days and I can recommend them to anyone (especially if you are interested in game development and art).
Here are all direct YouTube links:
hope you like them like I did ;)
Enjoy!

Hi guys!
I’ve been pretty busy in the last weeks – again I’ve invested ( I don’t wanna use “wasted”, yet ;) ) an uncomfortable, uncountable amount of hours in the story ( ;) but i think it’s always a good investment, no matter what).
Unfortunately I didn’t progress at all 3D production wise (mostly because I’m currently working on a 3D job day by day), but my part and involvement will be done this week, so expect more regular updates from then on. ok – lets say starting after the holiday season, in september ;) … but I’ll try my best to keep up.
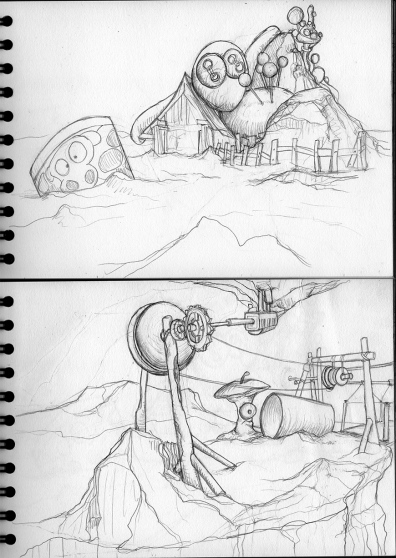
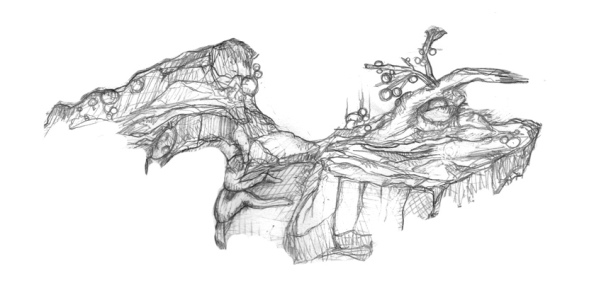
on the top you are looking at my latest set design (which is meant to be underwater), but what exactly has happened here to deserve more text @ 4am than usual? well, 360 degrees earlier the image started and looked like this: (a kind of bridge… boring and pretty regular)
(i think you can guess where i’m going with this ;) )
after i rotated it around, I got the idea to create a big un-balanced rock, so 90 degrees later I had something like this:
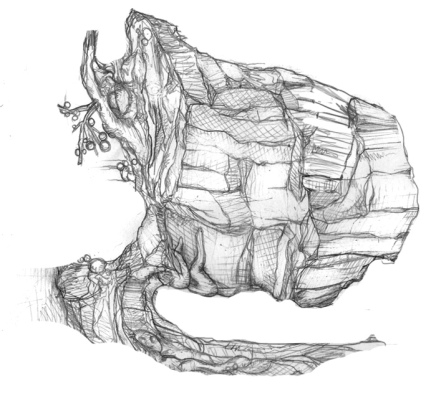
..which was definitely more interesting, but still, didn’t rock my boat enough to truly commit to it. Soooo another 90 degrees later, but basically back where I came from, I got to this point:
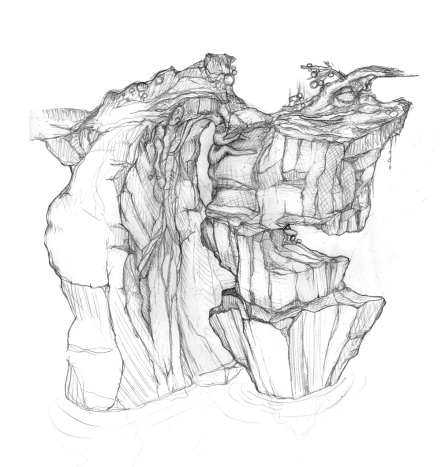
which was better and somehow unusual, but with another 180 degrees, it finally really caught my eye ….
(see the top for the final rotated and finished result)
so the decision to finish it from that perspective came pretty easy and fast, once i knew where i was going (who needs another bridge, rock or oldman style rock anyway :) ).
(the in-between images are derived from the final drawing, but were more or less similar – after every rotation you kind of commit to this new perspective and draw with it in mind, so its impossible to reconstruct them properly, just FYI)
that’s all folks, keep rotating! ;)
the second and last part of “the stem”, which shows Softimage and Arnold in action. (if you haven’t seen Part1, please scroll down a post)
If you have any questions/suggestions, please don’t hesitate and add a comment to this post!
enjoy!
Finally! After all the trouble (see post, and more to come ;) ), I can proudly present our first (of several) short makingOf movies! We are planning to show the entire production process of certain elements of the game. In this case the 3D production of the protagonist.
We captured our screens during all 3D sessions up to this point (excluding some stuff from the very beginning), and edited/polished them down to a watchable and hopefully enjoyable format.
have fun watching!
ok, after two miserable blog posts, this project has to regain some positive momentum :). All my commercial jobs are finished, and i avoided the usual “after-Work-depression” by ordering a lot of new equipment ;) – which unfortunately consumes almost all of my time right now, because a lot has to be assembled, setupped or even built. (and tons of old stuff has to be sorted and cleaned to regain some space)
Nevertheless we’ve worked on some administrative tasks like:
on the production side… i redrew two existing character concepts (mhhh… I should work on some new stuff), and created the 3d camera setup (angles) of the main character.
that’s pretty much it, thanks for reading!

